
Did you catch more fish than you can fit in your freezer? Try salt-curing your fish to preserve your catch instead.
These days, we tend to freeze food when we want to keep it on hand for a long time. Freezing is convenient, of course, but it’s also a major trade-off. If you’ve ever defrosted a salmon filet to find it tasteless and dry, you know what I mean. A possible solution? Go super old-fashioned and try your hand at salt-curing.
Salt has been used to preserve food for basically ever. Packing meat and fish in salt (or alternately, soaking it in a brine solution) not only preserves the food, but infuses it with more flavor and a lovely firm texture.
Not gonna lie: this is a lengthy process. But if you like to fish or you participate in a CSA-style program, salt-curing will come in handy when you suddenly have more fishes than one freezer can handle. You might say curing is really worth its salt! (But I won’t.)
A Few Notes Before Salt-Curing Fish
Coarse kosher salt is a terrific choice, as is Alaea salt or course sea salt.

Equipment for Curing Fish
- Fresh fish (sans heads, guts, and blood, and filleted off the bone)
- Lots of salt – see notes above
- A cooler or other large watertight container
- A baking sheet or large, flat-bottomed bowl
- A large, clean bucket for rinsing
- Clean wooden planks and non-metal weights (for smaller jobs, you can use dishes instead of planks)
- A wooden clothes-drying rack or other wooden frame
Curing Fish Phase 1: The Salting
Step 1: If you need to, sort your fish by type – you’ll need to preserve each type of fish separately.
Step 2: Coat the bottom of your cooler with a thin, even layer of salt. Grab a baking sheet or flat-bottomed bowl and pour a bunch of salt in that too.
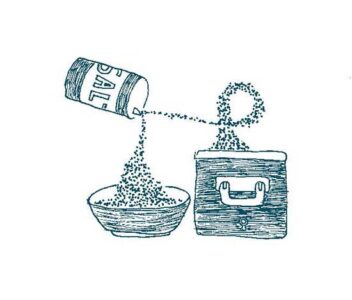
Step 3: Place each piece of fish into the bowl or baking sheet and coat thoroughly with salt. Pat the fish down to make sure the salt is sticking.
Step 4: Place the fish inside the cooler in a single layer, skin side down. Top this off with a layer of salt, and repeat until all the fish are in the cooler. Flip the top layer so the skin side is up. Finish off with a final, even layer of salt.
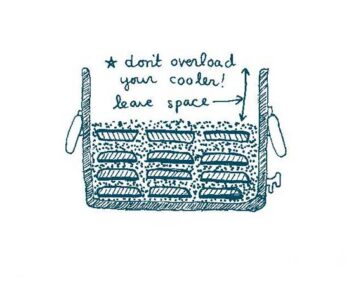
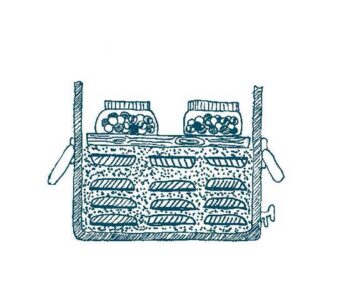
Step 5: Add a few wooden planks or dishes on top of the salt. Place the weights on top of the planks. As the salt draws moisture out of the fish, the salt will melt into a briny solution. You’re adding the planks and weights to keep your precious fishes submerged as this brine starts to form.
Step 6: Pop the lid on the cooler and let it sit for 2-3 weeks. The colder your climate is, the longer you’ll have to wait.
Check your fish every couple days to make sure they’re still submerged in brine, and to add more salt to the solution. Don’t forget this part! The fish can start rotting if the saturation level dips too much. Each time you add salt, put in enough so that no more will dissolve in the solution.
Do a smell test whenever you open up your cooler – you should smell fish, brine, and that’s it. Grosser smells indicate something’s gone wrong. The fish can be considered done (or phase 1 is, anyway) when the flesh is firm and translucent, and yields slightly when pressed. The fillets also might be a little smaller than when you put them in the cooler. If your fish stinks, is mushy, or is falling apart, toss it and scrub that cooler thoroughly with a baking soda paste.
Curing Fish Phase 2: The Drying
Step 1: Prep a batch of fresh brine (make it about as salty as sea water) and pour it into a clean bucket. Dig the fish out of the vat and rinse them in the bucket to remove any excess salt.
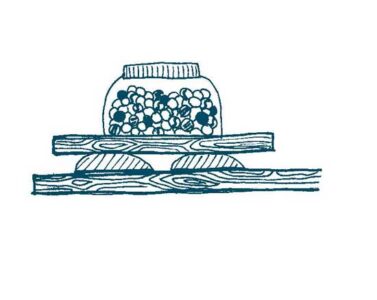
Step 2: Transfer the clean fish to a flat surface and cover them with a new set of planks and weights. The pressing will squeeze out any remaining water in the fish and make air drying a lot quicker.
Step 3: Set up a wooden grate or frame (like a clothes-drying rack) in a dry spot outside. When the fish is no longer sopping wet, lay them over the frame in a single layer, flesh side up. Try to let as little of the fish touch the wood as possible.
Let the fish stay here for a few days until each piece is thoroughly dry. Protect the fish from dampness as much as possible. That might mean moving the frame under an eave or into a ventilated shed during a rainstorm.

Final Tips for Curing Fish
Fish can get sunburnt, even when they’re dead. Too much sun can harden the fish’s outer flesh and keep the inner flesh from drying properly. So if you can swing it, keep your whole apparatus partially shaded for the first day of drying, and then move it into direct sunlight for the rest of the drying process.
You can try this indoors if you need to, but keep in mind you need plenty of direct sunlight and serious ventilation.
When the fish is totally dry, pack it in an airtight container and either keep it in the fridge or a very cool, very dry place. If you have the means to vacuum seal the fish, so much the better.
More Preservation Tips from Make it Last:

Reprinted with permission from Make it Last: Prolonging and Preserving the Things We Love by Raleigh Briggs and published by Microcosm Publishing, 2012.


